
Tutorial 1 - Introduction to Unity
|
In this tutorial you'll learn how to:
|
|
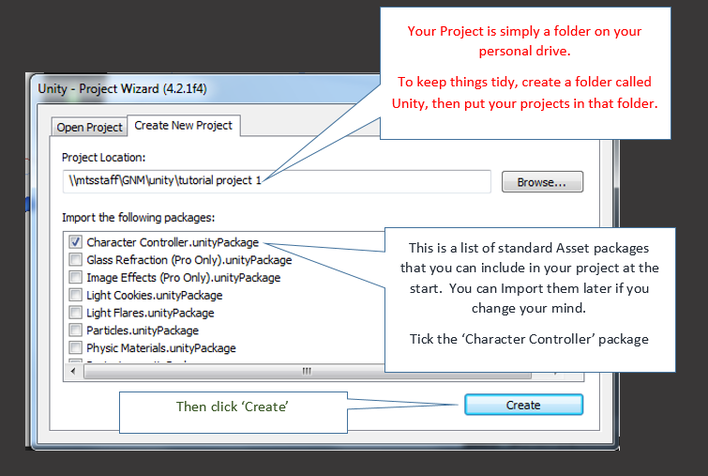
Start the program, create a project
|
When Unity starts the first time, it will ask you to create a project.
Once you've created a project, Unity will load it automatically the next time it starts. |
Unity will create a project for you and an empty Scene. Note that the Scene is not saved until you say so.
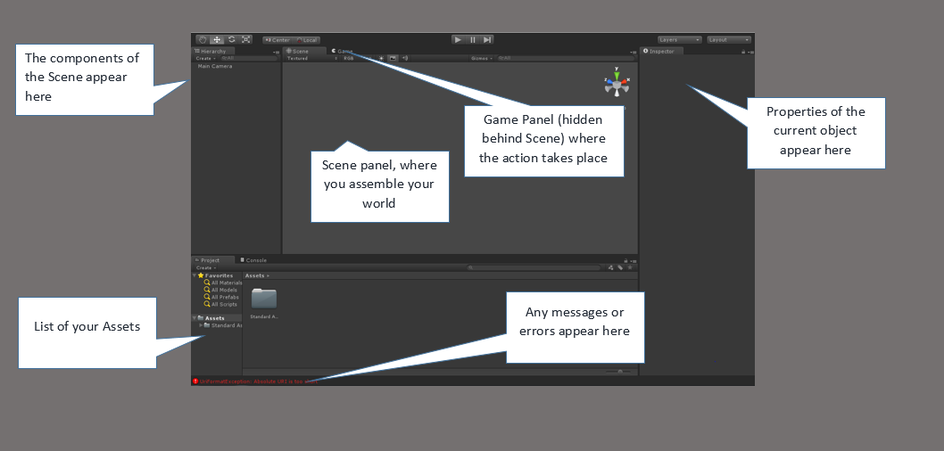
Get to know the Unity environment
This is the standard Unity layout. You can change this by dragging the components into new places. Note that the game window is hidden, to see it, click on the Game tab.
Adding a GameObject to your scene
|
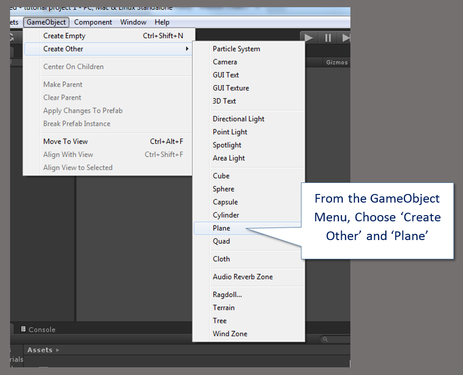
We'll start by adding a simple flat plane into the world.
Find the Unity menu, choose GameObject, Create Other, and Plane. Unity will add a small, white, flat plane into your world. You'll see it in the Scene window and the Inspector window will be full of information about the new object. Adjusting your view
Playing the game
Not very exciting so far. There's just a plane floating in space. You can't do anything. We're going to change that. Click the run button again to go back to the editor.
|
|
Adding the Character Controller
|
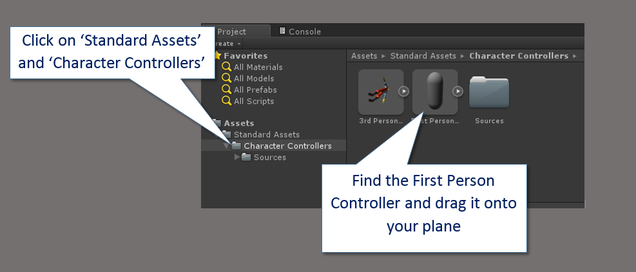
The Character Controller is a ready made grouping of assets and scripts (called a 'Prefab') that allows first-person interaction with the game.
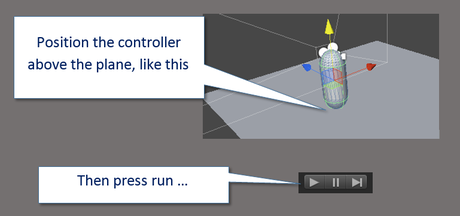
If you can't find it, make sure you have imported it. Go to the 'Assets' menu, choose 'Import Package' and choose 'Character Controller' As you drag it onto the Scene, make sure that it's positioned just above the plane, otherwise it will fall through when you play. |
|
|
|
That's a bit better. Now you can move around using the arrow keys, change your view with the mouse and fall off the edge of the plane if you wish.
It's all a bit gloomy though.
It's all a bit gloomy though.
Adding additional GameObjects
First let's cheer up the scene by adding some lighting. From the GameObject menu select 'Create Other' and 'Directional Light'.
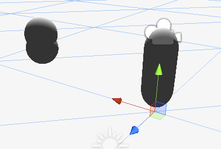
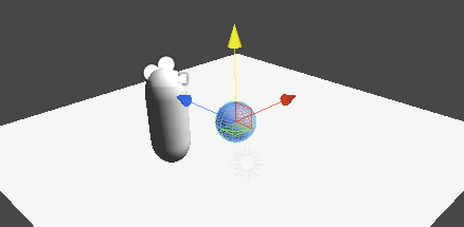
Then, again from the GameObject menu, select 'Create Other' and 'Sphere'
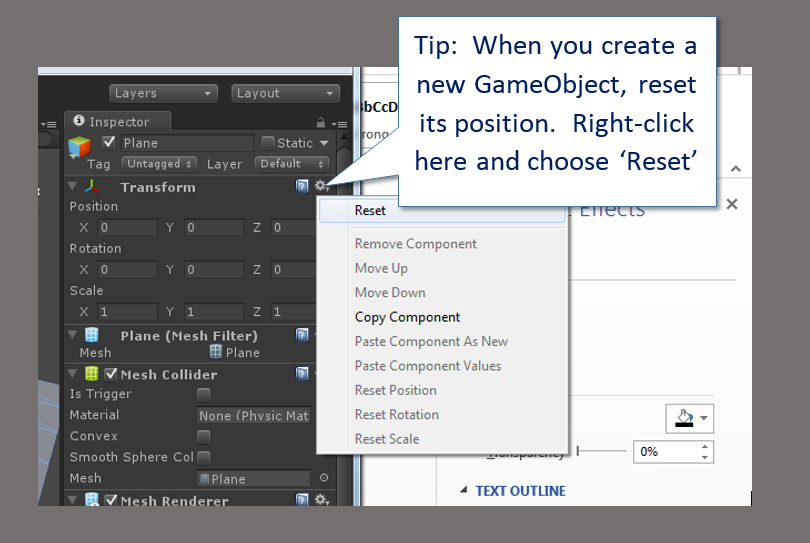
If you can't immediately see the sphere, use the tip above to reset its position.
Your Scene should look like this:
Then, again from the GameObject menu, select 'Create Other' and 'Sphere'
If you can't immediately see the sphere, use the tip above to reset its position.
Your Scene should look like this:
|
Manipulating GameObjects
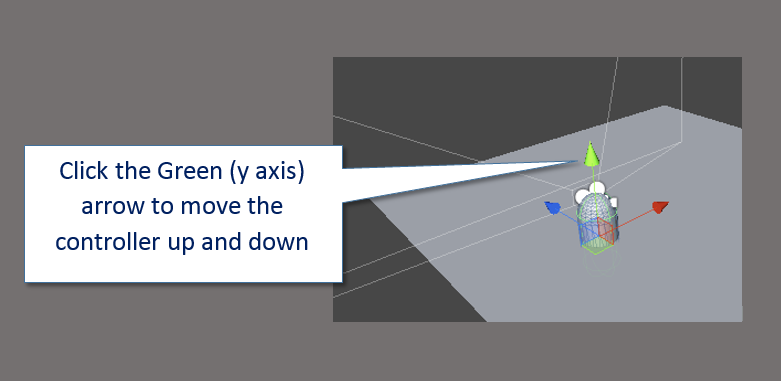
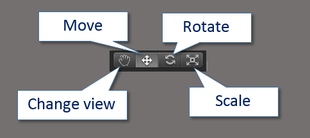
At the top left of your screen is an important group of controls. These let you manipulate objects in the scene. Try them out.
|
Now play the game as well. You should see that there's some basic lighting in the world, although everything is boring and white. You can move around but you can't move through the sphere.
Adding a script - your first program
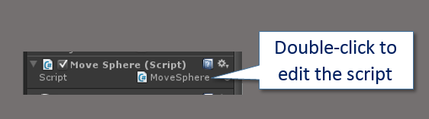
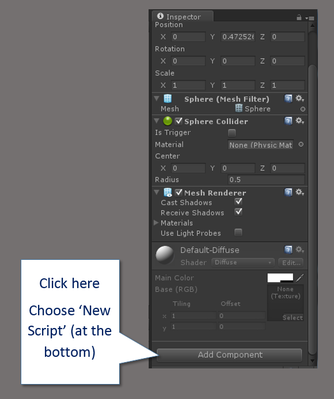
The script is added to the properties of the Sphere. It will appear as part of the alphabetically ordered list in the Inspector window (it may take a moment to find it).
|
|
Double-click the name of the script (next to the white and blue C# icon) to load the Script Editor. It might take a while.
Making the sphere move
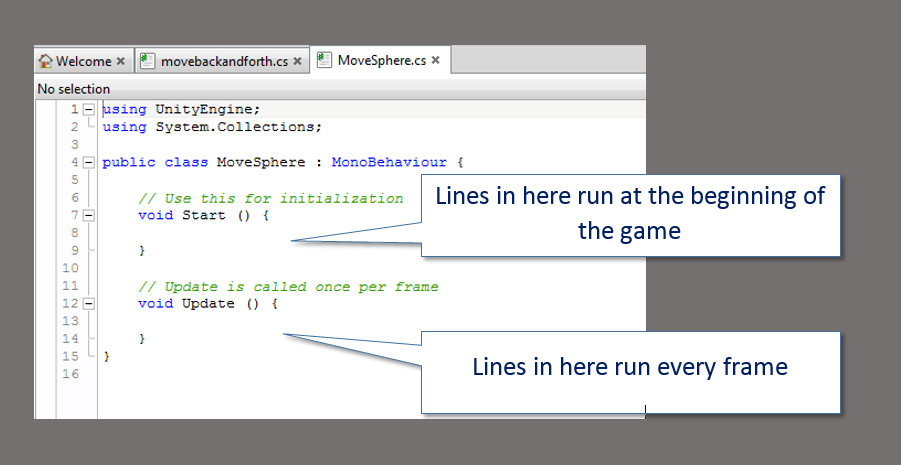
Welcome to the Mono Develop editor. It's a very nice, helpful script editor where you'll make things happen. Unity has created a blank script for you with two functions in it. Functions, as we'll see, are little sub-programs that are run when either you or Unity decide. The two basic functions are one called 'Start' which runs at the beginning of the game and is useful to set things up. We won't use it now. The other is called 'Update' and runs every frame.
We're going to make the Sphere move by changing its x position in the gameworld. To do that we'll need to create two variables.
Create the variables by typing the following immediately under the line that says 'public class ......'
- The first variable will be an integer variable (a whole number) and will tell the sphere how far to move on each frame
- The second variable will be a special 'Vector3' variable which allows us to find and set the position of the sphere in 3 dimensions.
Create the variables by typing the following immediately under the line that says 'public class ......'

- Lines are numbered for you as you add them. Your changes are marked in yellow on the left.
- In C# we create a variable by first announcing what type of variable it will be, then giving it a name and - if we want - giving, or assigning a starting value.
- In line 5 we've created a variable of type 'int' for integer - given it a name - 'howFar' and assigned it the value of 1.
- In line 6 we create a special type of variable,, 'Vector3' to hold the position of the sphere. It hasn't been given a value yet.
That's set up our variables. We're now going to change them to make the sphere move.
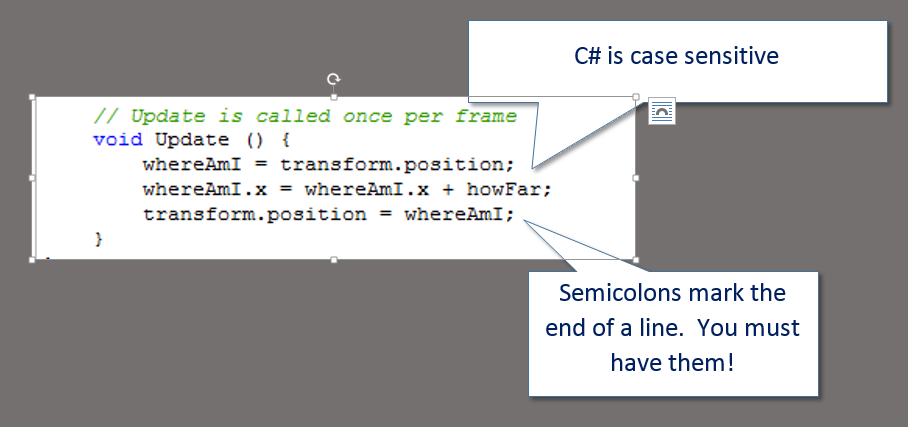
The changes will take place as the game runs, so the logical place to put them is in the 'Update' function. To make the sphere move, we'll will:
The transform value is a special variable supplied by Unity that contains information about the current GameObject (the one you attached the script to - in this case the sphere). Here's what the script will look like:
The changes will take place as the game runs, so the logical place to put them is in the 'Update' function. To make the sphere move, we'll will:
- find out where it is now, by looking at the 'transform' value
- put that value into our 'whereAmI' variable
- add the value stored in our 'howFar' variable to the x component
- update the transform value
The transform value is a special variable supplied by Unity that contains information about the current GameObject (the one you attached the script to - in this case the sphere). Here's what the script will look like:
|
|
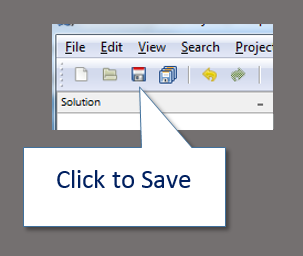
Save the script and click back into the Unity Editor. It will pause for a moment while it loads and compiles the script, making it ready to run. If you have errors in your script, this is the point where you'll know. You might need to go back to the code editor to make changes.
If everything is good, then click the Play button to see what happens. You should see that the sphere shoots off in one direction, forever!
If everything is good, then click the Play button to see what happens. You should see that the sphere shoots off in one direction, forever!
